Content Management: Adding Images/Slideshows/Videos to Community Pages
Introduction: 
You might be asking yourself right now “Why do I need a document to walk me through uploading an image to my site?” Believe us, you are not the first nor are you the last and the reason is simple; we want to help you to give your community the best experience online. Unlike other websites who allow you to upload a single image to web pages we want to empower you to take your media a step further, to the next level, and customize it to fit your needs. To do this we had to sacrifice the ease of adding a single image and allow you to add a gallery, a slideshow, or a video for that “WOW'' factor.
The following document will walk you through the process to add images, galleries, and videos to your Community Page and to any Announcement sections. We know you are going to have fun adding content to your site and we can’t wait to see how you use it.
In the past, to do this you were required to know a little bit of HTML code, however, using this tool built by us we took the coding out of the HTML and added a little bit more fun.
What Resources you will Need: 
Birme - https://www.birme.net/
PostImage - https://postimages.org
HTML Embed Excel File - Attached to this article located at the bottom of the page.
Part 1: Uploading Images 
1. You will want to gather all of the images that you would like to add and place them in a folder on your computer.
2. Go to https://www.birme.net/.
3. Use Birme to upload the photos.
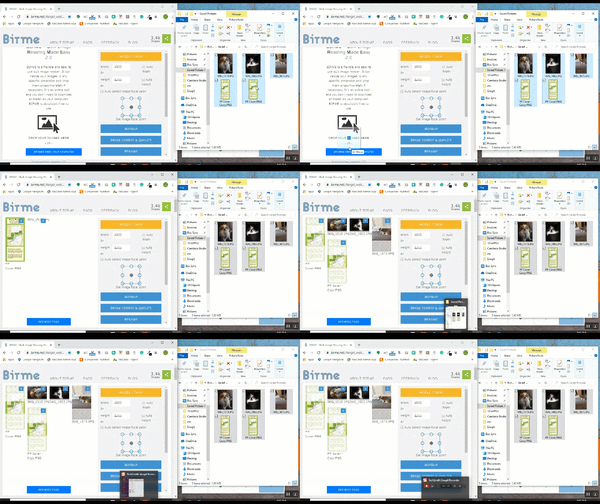
4. Once uploaded you will want to adjust the width and height all the photos be the same size. You can add in a border or change how the image is centered if you wish.
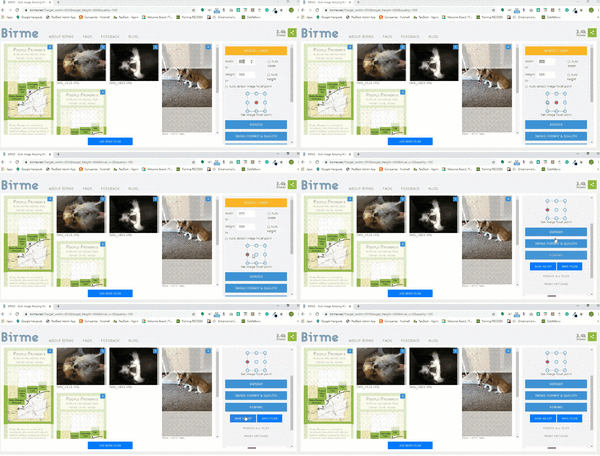
5. Once completed, Click on the Save as Zip and download it on your local drive.
6. Now go to PostImage - https://postimages.org and log in. If you do not have an account you will want to create an account.
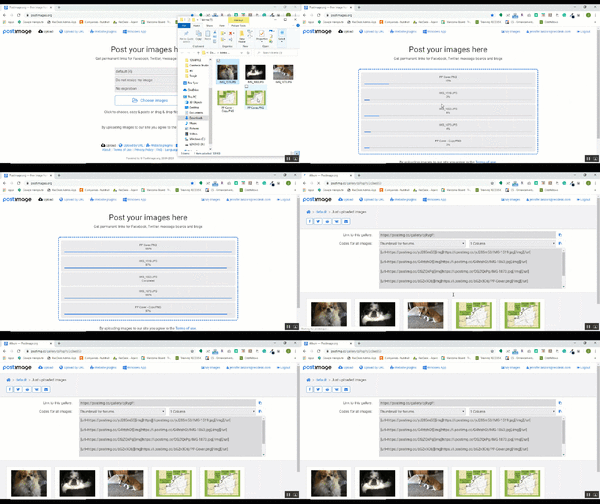
7. After you are logged in Click on “My images” and “Create a new Gallery”. Then upload the photos from the zipped file that you just downloaded
Part 2: Adding a Single Image or Grid
1. Pick out your layout
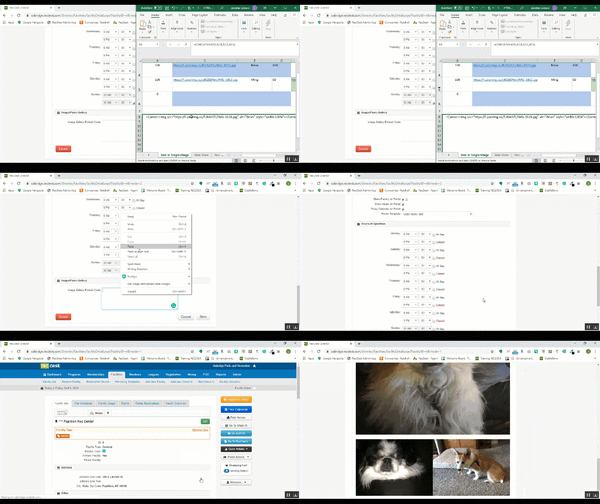
2. Once uploaded, open the HTML Embed Excel Sheet (attached at the bottom of this page) and begin to copy and paste the direct link from PostImage into the sheet matching the Style you picked. Be sure to give each photo a short description for ADA compliance and set the width. If you set the width to 100 it will take up the entire space on that row. If you want two images side by side you will set the width to 50. Three images will be 33. If you see a message “Too Wide” on the left side you need to readjust the width of the images so the sum is less than 100.
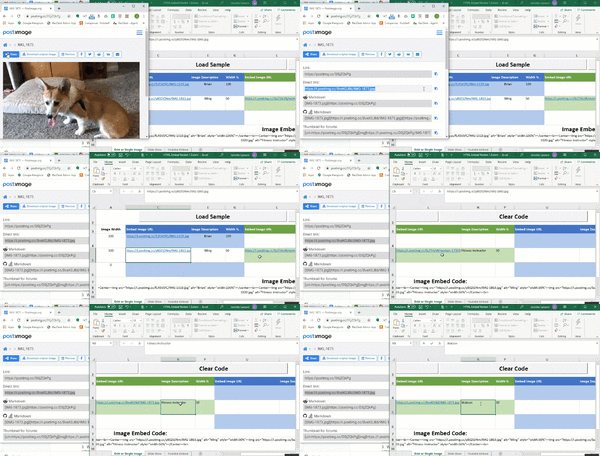
3. When you are all done the last thing you need to do is copy and paste the HTML into its final location. In this case, we are adding them to a facility.
Part 3: Adding a Slideshow 
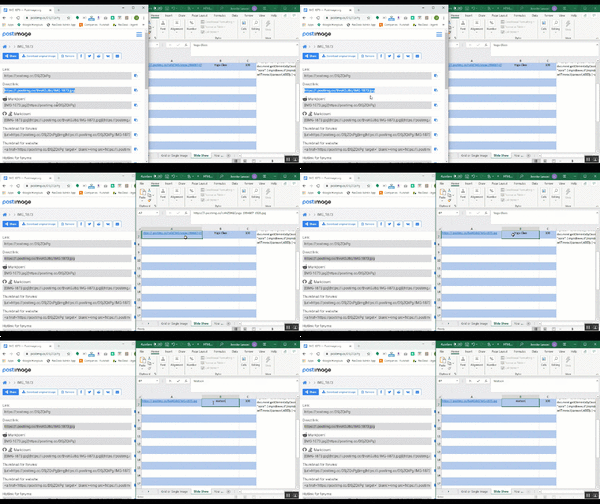
1. Open the HTML Embed Sheet and click on the Slide Show Tab.
2. Enter in the time when the photos should rotate. The default is 4 second.
3. You can now begin to paste the direct links from PostImage into the sheet. Be sure to give each photo a short description, required for ADA compliance, and set the width. The width should be the same for all of the images.
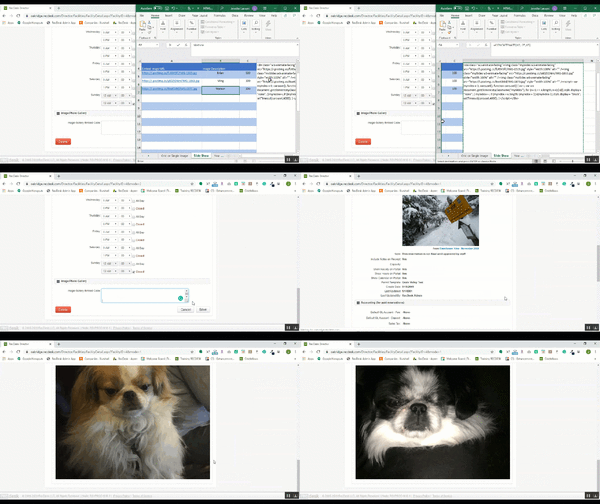
4. When you are all done the last thing you need to do is copy and paste into its final location. Once you do that you will need to refresh the page. In this case, we are adding them to a facility.
Viewed 3,325 times
4 Comments
Tom Gorycki - Please add <center> at the beginnnig of the embed code and </center> at the end of the embed code on slideshow tab so if they change the percentages to a number less than 100 the slideshow will be centered. Thanks so much!
Maureen Turner Yep this is going to go in the next update when we add some more resources for Content Management. Not sure when that will be yet.
Tom Gorycki Thanks!
Jennifer Vogt - Some of the images are missing on this HQ article. Can you please update it with new screenshots? Thanks so much! FYI Megan Jackson